
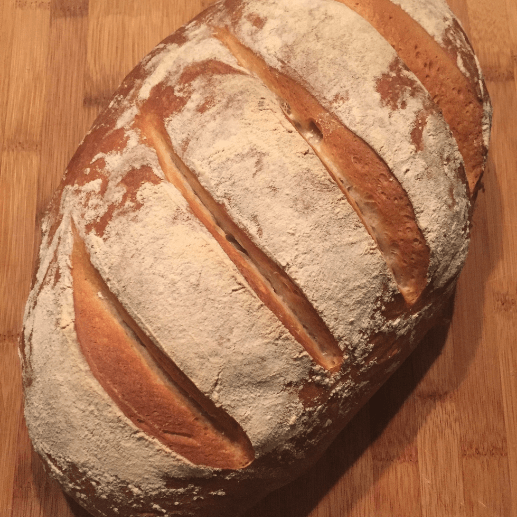
How to make white bread with Kitchenaid Mixer, which is an easy store cupboard recipe on how to make bread successfully and easily at home. Many beginners in particular wonder just how easy is it to make bread dough using a stand mixer, and also ask if they can make bread dough with a dough hook successfully? So if you have ever needed how to make bread with a KitchenAid, then this video in the recipe section below will show you how.
If you learn to make one thing in life, make it bread. I have lost count of how many times I have made bread, due to being snowed in during winter months. I always keep strong bread flour and yeast in my cupboard, so whilst others are trying to find a sliced loaf. Baking homemade bread keeps me happy and content in my kitchen, which fills my home with the wonderful aroma of baking bread. Baking bread is a great stress reliever too, as I find kneading somewhat therapeutic. Most the time though, I use my Kitchenaid mixer with its dough hook, which gives great results. This is a great solution for those who may have arthritis or joint pain in their hands.

How To Make White Bread With KitchenAid Mixer
- Total Time: 2 Hours 30 Minutes
- Yield: 12 1x
Description
How to make white bread with Kitchenaid Mixer, an easy store cupboard recipe on how to make bread at home. Many wonder how to make bread dough, and ask if they can make bread dough with a dough hook successfully? So if you have ever needed how to make bread with a KitchenAid, then this video will show you how to do it.
Ingredients
- 500 g strong White flour
- 1 tsp salt
- 1 tsp sugar
- A little olive oil for greasing
- 7 g (1 generous teaspoon) easy bake yeast
- 300 ml luke warm water
Instructions
Add flour and sugar to a large bowl, place the salt one side of the bowl and the yeast the other side of the bowl. The reason I do this, is that salt can kill yeast, so to place it away from each other initially helps. Add enough water and mix to form a soft dough.
Knead the dough (I tend to use setting 1 ) on a lightly floured surface for up to 10 minutes until smooth and elastic. If using my mixer with dough hook, I also knead for ten minutes.
Place the dough in a bowl which has been greased lightly with olive oil inside. Place the dough inside and then cover it with cling film tightly. This stops a skin developing on the dough. Leave in a warm place to rise until it has doubled in size which may take around an hour. If your house is cold it can take up to three hours! Remove the dough onto a floured surface and knock back the air. Place in a 900 g loaf tin, cover with a big loose bag and let it prove a little longer for half an hour sometimes longer depending on the heat of your home. Don’t put in a deliberately hot place though, as that can affect the dough. Preheat the oven to 230 degrees centigrade.
When ready to bake, slash the top of the dough and dust with a little extra flour. Place into the oven for around 15 minutes. Reduce the oven temperature to 200 degrees centigrade and cook for a further 20 minutes. Check that it is cooked by tipping the loaf out of the tin and tapping the bottom, it should sound hollow.
Place the bread on a wire rack, and let it cool completely before storing in an airtight container.
Notes
If it starts to brown too quickly for your liking, place some tin foil on top and continue to cook.
- Prep Time: 2 Hours
- Cook Time: 30 Minutes
- Category: Baking
- Method: Oven
- Cuisine: British
Nutrition
- Serving Size: 1 Slice
- Calories: 165
- Sugar: 0.5g
- Sodium: 224.5mg
- Fat: 1.6g
- Saturated Fat: 0.2g
- Unsaturated Fat: 0.3g
- Trans Fat: 0g
- Carbohydrates: 32.4g
- Fiber: 1.3g
- Protein: 4.5g
- Cholesterol: 0mg
Is Kitchenaid good for making bread?
I find that the Kitchenaid is excellent for making bread! I have never had a bad bread result using the method that I use. Why not try the Kitchenaid bread recipe above, as you will then get the bread making bug!
Can you use a Kitchenaid to knead bread?
Yes you can use a Kitchenaid to knead bread, and other doughs such as pizza dough. It gives great results, and turns out excellent! So if you are looking for a bread recipe for mixer with dough hook, then give my bread recipe above a try. It’s easier than you think!
Is Kitchenaid dough hook better than hand kneading?
I enjoy using my Kitchenaid dough hook simply because it means I can get on with other things whilst it is doing the hard work! Also, it really helps people with conditions such as arthritis, as they struggle to use their hands. Do I still hand knead? Yes I do on occasions, because some moments I just like that feel of dough, and the steady rhythm and that love of being in a kitchen. Although there are many times, where I am so busy or tired after a stressful day, that the Kitchenaid is like my best kitchen buddy helping me.


Looks yum
Is the oven temperature you suggest on normal or fan setting? I haven’t tried this recipe yet but once I have I promise to rate it.
Hello Terry. This is non fan temperature. However I’ve found different ovens have different temperatures (silly I know but true) and do it is a case of keeping an eye on it. In my studio kitchen the oven is hotter than the one at home, so I tend to take the bread out the oven part way through (if it gets too brown on top) and place some foil over it. That way it can keep cooking without burning, if you get me… However the one at home I don’t need to do that. Hope that helps and can’t wait to see your bread on my social media… I love seeing all followers creations! 🙌🙌
Such a lovely loaf. I added some olive oil to my dough and it turned out great and lasted almost 3 days (surprisingly as we are bread fiends!!). I didn’t take a photo but I am just making another loaf so will be sure to add it to Instagram and tag you 🙂 I didn’t put it in a tin, just left it to do it’s own thing, which it did, perfectly. Today I only had 450gms white bread flour so I had to top it up with wholemeal. I put it on 200 fan (the highest my oven goes, then reduced it to 180. I also put a roasting tin in the oven and added boiling water. I might just use a dutch oven this time to see if it makes a difference.
Oh Adrienne please tag me in to the photo I love seeing everyone’s bakes and often pop them on my twitter as well! Sometimes I add the water in the roasting tin too as that gives a slightly different crust for a change. Thank you for your feedback it’s most appreciated!
Used this recipe today, so straightforward and produced the loveliest loaf! I have a fan assisted oven and baked at 220 deg C for 15 minutes and then 200 deg C for 20 minutes, the loaf came out perfect!
Fantastic Michelle! It is great how it is so easy to make a fabulous home made loaf, and I am so pleased you tried the recipe!
Hi Emily, basic question probably, what speed do you knead the dough on when using the dough hook? I have all the ingredients in my cupboard so will be making a loaf today as the weather is rubbish! Thanks, jacqui
Hi Jacqui I find speed 2 works perfectly for the doughs …. enjoy … nothing better with this awful weather!
Have made this a few times now even used wholemeal flour and works a treat as long as you let it rise enough both times.
Nothing like a wholemeal loaf! Love it! Glad you are enjoying the recipe.
I’m trying tomorrow can I add cheese and at what stage x
Usually in the last prove phase … so after you have knocked it back, you then let it rise again. After knocking it back add the cheese as you are knocking it back. Hope that makes sense!
Hi Michelle, as a newbie to break making can you explain what ‘knock back the air’ means? And also, how much is ‘enough’ water? Thank you 😊
Yes when it’s had it’s first rise, it puffs up so as per the video you just give it another knead and shape. As for water the dough should be slightly tacky and not dry. A wetter dough is harder to deal with but it produces a better loaf! Enjoy making it Eve!
Hi, if I was to make 3 times the amount in 1 go to make a batch up, would I need to have the mixer on for longer?
If making in a kitchenaid I would be careful in making too big a dough quantity as this could damage the engine of your machine. So make three separate batches if you get me?
Also, if I was to make the dough, then go out for a few hours leaving it to rise, would it matter if I left it for a few hours or does it have to be 2?
I’ve just made my first ever successful loaf using your recipe, I cannot believe how easy it was and now I want to make it all the time
It’s very addictive! 😭 You will find that the rising varies according to time of the year. So when your home is warm in the summer don’t leave it too long, if you home is cooler in the winter (without central heating on high) then you will get a slow prove which can add to a nice flavour. The more you make it and trial it on different scenarios will make it easier. Glad you love it 🙌
Could you please do the recipe in cups as I live in Canada
Hello there,
If you go down to recipe card, near to where it says “ingredients” you will see two buttons. One is “M” the other is “US” if you click on the “US” button it should convert to American measurements for you. Many thanks!
Hi Emily, lots of recipes make you mix instant yeast with water first? Is that no necessary. Genuinely just need to know! Thanks Jill
Hi Jill. I use the Allinsons Yeast Easy Bake …. Even on their packaging instructions it says “Always Add The Yeast To The Pre-Mixed Dry Ingredients Before Adding Liquid..” So I would check on the instructions which yours suits (if you get me) 🙌👌
Amazing, funnily enough that’s the same one in my cupboard! Will let you know how it goes, thanks again! Jill
That’s a blessing!! Just see the tub to the left hand side of the join rim at the bottom and that is their guidelines …. Hope that helps! 🙌
Just make sure it has a real good date to it. The nearer it gets to expiry the less action it has … a bit like me first thing in a morning 🤣
Likewise 🤣🤣
I’ve made this recipe twice now and it’s just the perfect white bread recipe I have come across. I’m a big fan of a video step by step guide which really helped but there’s nothing about this recipe that is hard, it’s straightforward and the results are delicious! Thank you Emily!
Thank you Olivia! One of my biggest gripes is people making food videos drag out forever (usually to get their videos monetised for revenue) – I would rather take the process steady, be concise and give folks what they want! I’m so delighted you love the recipe as much as I do! X
Great video and so easy to follow. I tried to follow your recipe to the letter but I found that I had to add a little flour as it seemed to be sticking to the sides of the mixer bowl. The double proofing was perfect and in the oven following your instructions. Not bad for my first try and it tastes yummy. Thank you Emily.
First loaf i’ve ever made and it turned out absolutely delicious, thanks!
Wife and kids loved it too. I followed what another commentor said and baked for 15 minutes on 220c fan, then 20 minutes 200c fan which turned out perfect.
Im so pleased you enjoyed it! It is a fabulous and quick recipe to make your own homemade bread. With regard to the temperatures, it can always be a little tricky with different makes and models of ovens. However I am glad you got the right setting!